3 Tres Leches Cake Recipes: Easy Variations to Try at Home
Table of Contents
Three milks. That is the whole idea, and it sounds simple until you taste one that is actually done right. Most people get the ratio wrong, which means the cake either sits there dry in the middle or turns into a soggy, collapsed mess by the third day. The difference between a professional-level tres leches cake and a forgettable one lives in texture, not in complexity. Get the soak right, nail the sponge structure, and you have a cake that tastes incredible and holds up under scrutiny.
The history of this Mexican tres leches cake recipes stretches back decades, born from a practical idea: use the milk products you have on hand to create something unforgettable. What started as a resourceful dessert in Latin America has become a global obsession, and for good reason. But the technique is precise. The sponge must be light enough to absorb without collapsing. The milk mixture must be balanced so it soaks in slowly, not all at once. The timing matters. This is not a forgiving cake, which is exactly why mastering it separates home bakers from people who can actually deliver on a cake order.
What Makes The Best Tres Leches Cake Recipe Authentic?
Authentic tres leches is not about fancy ingredients or trendy add-ons. It is about three specific dairy components working in concert to create a cake that is moist, custardy, and utterly distinct from anything you make with butter and sugar alone. The tres leches cake recipes itself is a vanilla sponge, light and airy. The three milks are whole milk, sweetened condensed milk, and evaporated milk, traditionally, though some cooks swap in heavy cream or coconut milk depending on regional preference. The topping is whipped cream, fresh fruit, and a pinch of cinnamon.
What makes this cake culturally significant is that it represents efficiency and resourcefulness. In Mexico and across Latin America, condensed and evaporated milk were (and still are) pantry staples because they keep for months. A baker could combine them with fresh whole milk and create something luxurious without relying on a constant supply of fresh dairy. That constraint became genius. The result is a cake that tastes indulgent but does not require expensive cream or butter in massive quantities.
The texture is the tell. A proper tres leches cake should feel almost custard-like in the center, with a slight bounce to the crumb. It should never feel dry. It should never feel like you are eating a sponge that absorbed water. That balance is what separates a professional result from a home baker’s first attempt.
Understanding The Three-Milk Soak Technique
The three-milk mixture is where the magic happens, and the ratios are not negotiable if you want consistent results. The standard formula is one can of sweetened condensed milk, one can of evaporated milk, and one cup of whole milk, combined together. Some recipes add heavy cream as a fourth component for richness, but the traditional three-milk base is what you should master first.
The sweetened condensed milk brings sweetness and body. The evaporated milk brings creaminess and a subtle caramelized note. The whole milk is the carrier, thinning the mixture so it can actually absorb into the sponge without pooling on the surface. If you use only condensed and evaporated milk without the whole milk, you end up with a syrup that sits on top of the tres leches cake recipes like glaze. The sponge cannot absorb it fast enough, and you get a wet, unstable cake.
Temperature matters more than most bakers realize. A cold milk mixture will absorb slowly into a room-temperature cake, taking hours or even days to fully penetrate. A warm milk mixture (around 90 to 100 degrees Fahrenheit) will absorb faster, which is why many professional bakers warm the mixture slightly before pouring it onto the cooled sponge. The warmth opens up the crumb structure, allowing the liquid to travel through the cake more efficiently. This is the difference between a cake that needs 24 hours to set and one that is ready in 12.
Do not skip the straining step. After you combine the three milks, pour the mixture through a fine-mesh strainer to remove any lumps from the condensed milk. Lumps will create pockets of uneven absorption, and you will end up with some bites that are super sweet and others that taste dry. A smooth mixture absorbs evenly.
Why Sponge Cake Density Matters For Absorption
A standard butter cake will not work for tres leches. Butter cakes are dense and tight-crumbed by design. They are made to stand up to frosting and handling. A tres leches cake needs the opposite structure. It needs a sponge that is open, airy, and willing to absorb liquid without losing its structure.
A proper sponge cake is built on whipped eggs and very little fat. The air bubbles created by whipping whole eggs or egg whites are what give the cake its light texture and its ability to absorb the milk mixture. When you pour the three-milk soak onto a sponge, those air pockets fill with liquid, transforming the crumb into something custardy and moist. A butter cake, by contrast, has a tight crumb that resists absorption. You end up with a cake that feels heavy and does not take on the milk flavor properly.
The density of your sponge should be light enough that you can press your finger into it and the indent springs back slowly, not instantly. If it springs back immediately, it is too dense. If your finger sinks in and stays, it is too wet or underbaked. That sweet spot is what allows the milk mixture to soak in over 12 to 24 hours without the cake collapsing under its own weight.
This is also why you cannot substitute a box cake mix for a homemade sponge and expect professional results. Box mixes are formulated with stabilizers and higher fat content to ensure they stay moist longer on the shelf. They will not absorb the milk mixture the way a fresh, homemade sponge does. If you must use a box mix, use the lightest, most basic vanilla version available, and reduce the liquid in the recipe slightly to compensate for the different crumb structure.
How Do You Prepare A Classic Tres Leche Cake?
The process is straightforward if you follow each step with intention. You are making a sponge cake, preparing a milk mixture, and then allowing time for the absorption to happen. There is no rushing. The cake that looks perfect after two hours will taste flat. The cake that sits overnight will taste incredible.
Whipping Egg Whites For A Fluffy Base
Most tres leches recipes use a sponge built on whipped egg whites. You are separating eggs, whipping the whites to stiff peaks, and then folding in the yolks and dry ingredients gently so you do not deflate the air bubbles you just created. This is the foundation of the entire cake.
Here is the technique: whip six to eight egg whites with a pinch of salt until they form stiff, glossy peaks. This takes about five to seven minutes with an electric mixer on medium-high speed. The peaks should be firm enough that when you lift the whisk, the foam stands straight up. Under-whipped whites will not provide enough lift. Over-whipped whites will look grainy and will break down when you fold in the other ingredients.
In a separate bowl, whisk together the yolks with sugar until pale and thick, about two minutes. Then fold the yolk mixture into the whites in two additions, using a rubber spatula and a gentle folding motion. Fold from the bottom of the bowl up and over, rotating the bowl as you go. This is not the time to be aggressive. You are trying to keep as many air bubbles intact as possible.
After the yolk mixture is incorporated, sift together your flour, baking powder, and salt, then fold that into the egg mixture in one final addition. Sift the dry ingredients directly over the batter and fold gently. Do not stir. Do not beat. Just fold until you see no streaks of flour. Pour into a prepared nine-by-thirteen-inch pan (or equivalent), smooth the top, and bake at 350 degrees Fahrenheit for 25 to 30 minutes, until a toothpick inserted in the center comes out clean and the top is golden.
The cake should spring back when you touch it lightly, and it should smell like vanilla. If it looks pale or feels dense when you press it, it needs another two to three minutes. Do not overbake. Overbaking dries out the sponge, which means it will not absorb the milk mixture properly, no matter how long you let it sit.
Perfecting The Temperature For The Milk Mixture
Once the sponge comes out of the oven, let it cool completely. This usually takes about an hour at room temperature. Do not rush this step. If you pour a warm milk mixture onto a warm cake, the sponge will continue to bake slightly from the residual heat, and the absorption will be chaotic. You want a cool cake and a slightly warm milk mixture so the absorption happens at a controlled, even pace.
While the cake cools, prepare your three-milk mixture. Combine one can of sweetened condensed milk, one can of evaporated milk, and one cup of whole milk in a bowl. Stir until fully combined and smooth. If you are adding any flavoring (cinnamon, vanilla extract, rum, or liqueur), add it now. Strain the mixture through a fine-mesh strainer to catch any lumps or debris.
Warm the mixture gently by placing the bowl over a pot of hot water (a double-boiler setup), stirring occasionally, until it reaches about 90 to 100 degrees Fahrenheit. You are not cooking it. You are just taking the chill off. A warm mixture will absorb into the sponge faster and more evenly than a cold one. The warmth opens up the crumb structure, allowing the liquid to travel through the cake without pooling on the surface.
Use an instant-read thermometer to check the temperature. If you do not have one, dip your clean finger into the mixture. It should feel warm but not hot, like a comfortable bath. If it is too hot, wait a few minutes. If it is too cold, it is fine to use, but the absorption will take longer.
Duration For The Overnight Resting Period
This is where patience becomes your greatest tool. Once the sponge is cool, use a fork or a skewer to pierce the entire surface of the cake in a crosshatch pattern. You are not trying to destroy the cake. You are creating tiny channels that allow the milk mixture to penetrate deeper into the crumb. Aim for one puncture every half-inch or so across the entire surface.
Pour the warm milk mixture slowly over the entire surface of the cake, starting from the edges and working toward the center. Let it soak in. You should see the liquid absorbing gradually. If it pools on the surface and does not absorb after a minute or two, your cake is either too dense or your mixture is too cold. If the cake is too dense, there is not much you can do at this point. If the mixture is too cold, warm it up slightly and try again.
Once the mixture is fully absorbed (and it should be completely absorbed within five to ten minutes), cover the cake and refrigerate it. This is the critical part: let it sit overnight, ideally for 24 hours. During this time, the moisture distributes evenly throughout the sponge. The flavors meld. The cake transforms from a light sponge into something custardy and rich. A cake that has only rested for four hours will taste good. A cake that has rested for 24 hours will taste incredible. The difference is noticeable.
Some bakers prefer to let the cake rest at room temperature for the first two to three hours before refrigerating, claiming that the warmer temperature allows for better absorption. Others go straight into the fridge. Both methods work. The room-temperature method might shorten the total resting time to 16 to 18 hours. The straight-to-fridge method requires the full 24 hours. Pick whichever fits your schedule, but do not skip the resting period entirely.
Which Variations Of Tres Leches Recipes Should You Try?
Once you have mastered the classic version, the variations are endless. The foundation is always the same: a light sponge, a three-milk soak, and whipped cream on top. What changes is flavor, texture, and presentation. These variations are not departures from tradition. They are extensions of it, honoring the original while making room for creativity.
Incorporating Traditional Mexican Cinnamon And Vanilla
The most common flavor enhancement is cinnamon and vanilla. Add one teaspoon of vanilla extract to your milk mixture and one-quarter to one-half teaspoon of ground cinnamon, depending on your preference. Some bakers also add a small pinch of nutmeg for warmth. These spices do not overpower the cake. They create a subtle background note that makes people say “something is special about this” without being able to name it.
If you want a stronger cinnamon flavor, you can also sprinkle a light dusting of ground cinnamon mixed with a tiny bit of sugar over the top of the cake before adding the whipped cream. The cinnamon will sit on top of the cake and provide a visual cue and a flavor hit when someone takes their first bite. Do not overdo it. A light dusting is elegant. A thick layer tastes medicinal.
Mexican cinnamon (Ceylon cinnamon) is milder and slightly sweeter than cassia cinnamon, which is what most grocery stores sell. If you can find Mexican cinnamon at a Latin market or online, use it. The flavor is more refined, and it will not make the cake taste like a spice cabinet exploded. If you cannot find it, regular cinnamon works fine. Just use a slightly smaller amount.
Adding Toasted Coconut Or Dulce De Leche
For a tropical twist, toast shredded coconut in a dry skillet over medium heat for about three minutes, stirring constantly, until it is fragrant and light golden. Let it cool, then fold half of it into the whipped cream topping and sprinkle the rest over the top of the cake. You can also add one-quarter teaspoon of coconut extract to the milk mixture for deeper flavor, though this is optional.
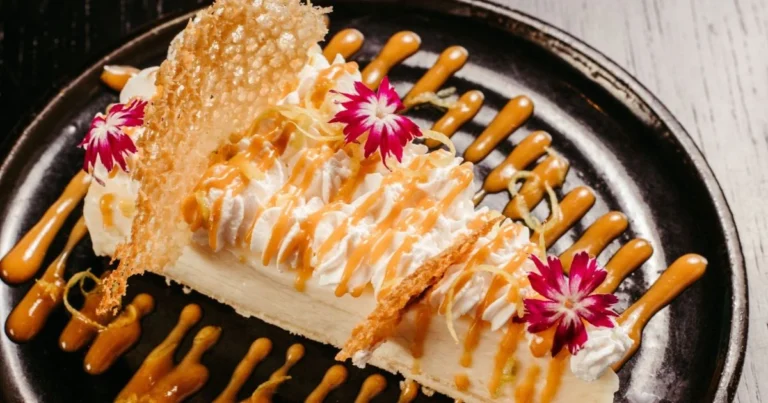
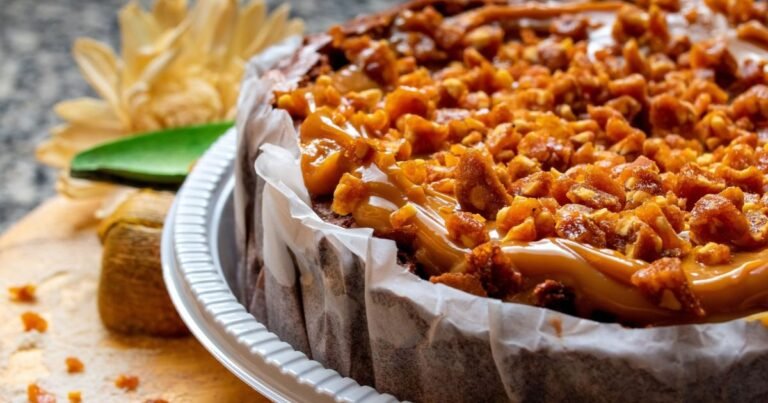
Dulce de leche is a Latin American caramel sauce made from sweetened condensed milk. You can buy it premade, or you can make it by heating a sealed can of sweetened condensed milk in a water bath for two to three hours (a technique that requires careful attention to keep the can submerged and avoid explosion). If you are using store-bought dulce de leche, swirl it into the whipped cream topping or drizzle it over individual slices. Do not add it to the milk mixture itself, as it will make the soak too thick and prevent even absorption.
Another option is to replace one-quarter cup of the whole milk in your three-milk mixture with dulce de leche thinned with a bit of water. This creates a caramel-flavored soak that is more subtle than adding it to the topping. Strain this mixture carefully to catch any lumps, and proceed as normal. The result is a cake that tastes like caramel and vanilla, which is almost impossible not to love.
Creating A Fruit-Topped Seasonal Version
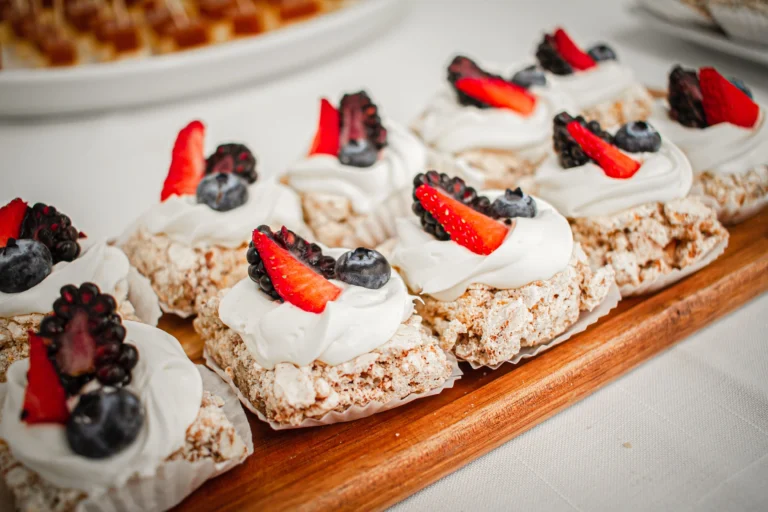
Fresh fruit is the easiest way to brighten a tres leches cake and balance the sweetness of the milk. Strawberries are traditional. Slice them thinly and arrange them over the whipped cream topping just before serving. Mango is tropical and delicious. Peel, pit, and slice fresh mango, then arrange it in a pattern over the top. Raspberries, blackberries, and blueberries are also excellent choices. They add tartness and visual appeal.
The key is to add the fruit as close to serving time as possible. If you arrange fruit on top of the cake and let it sit for hours, the fruit will release juice, which will soften the whipped cream and make the cake look less polished. If you are making the cake ahead of time and need to store it, keep the fruit separate and add it right before you serve.
You can also macerate the fruit (soak it in sugar and a splash of lime juice or rum) for 15 to 30 minutes before arranging it on the cake. This creates a light syrup that adds flavor without being as heavy as the milk mixture. A tablespoon of lime zest sprinkled over the top of the cake adds brightness and a hint of citrus that makes the whole dessert feel more sophisticated.
Why Does The Sponge Cake Sink Or Get Mushy?
If your cake is collapsing or turning into mush, one of three things went wrong: the sponge was too dense to begin with, you used too much milk mixture, or you let it soak for too long. Let us walk through how to diagnose and fix each problem.
Preventing Structural Collapse After Baking
Structural collapse usually means the sponge was underbaked or too dense. An underbaked sponge will feel soft and will not have enough structure to support the weight of the milk mixture. A dense sponge, as discussed earlier, does not have the right crumb structure to absorb liquid properly.
To prevent this, make sure your sponge is fully baked. A toothpick inserted in the center should come out clean or with just a few moist crumbs. The top should be golden and spring back when you touch it. If you are consistently getting underbaked cakes, your oven might be running cold. Invest in an oven thermometer and check the actual temperature. Many home ovens are off by 25 degrees or more, which can throw off baking times significantly.
Also, make sure you are not opening the oven door too early or too often while the cake is baking. Every time you open the door, the temperature drops, and the baking process is disrupted. Set a timer, and do not peek until the timer goes off.
Once the cake is baked and cooled, handle it gently. Do not poke at it or press on it more than necessary. Do not move it around in the pan. The sponge is delicate. Treat it with respect. If you need to move the cake, slide it onto a cooling rack while it is still warm (and still in the pan), then slide it back into the pan once it is cool. Or just leave it in the pan and pour the milk mixture in there. There is no rule that says you have to remove it first.
Balancing Liquid Volume To Prevent Sogginess
Too much milk mixture is the most common culprit behind a mushy, falling-apart cake. The standard ratio is one can of sweetened condensed milk, one can of evaporated milk, and one cup of whole milk for a nine-by-thirteen-inch cake. If you are making a smaller or larger cake, scale accordingly. A standard nine-by-thirteen-inch cake should absorb about three and a half to four cups of liquid total. If you pour in significantly more, you will end up with a cake that feels more like a bread pudding than a tres leches.
The way to tell if you have used too much liquid is to look at the cake a few hours after you have poured the mixture on. If there is still liquid pooling on the surface and not absorbing, you used too much. If the cake feels mushy and falls apart when you try to slice it, you used too much. If the bottom of the pan has a pool of liquid that has not been absorbed after 24 hours, you used way too much.
For your next attempt, reduce the whole milk component by one-quarter cup and see how that works. You can always make the mixture slightly thinner if needed. You cannot remove liquid once it is in the cake. Also, make sure you are using a nine-by-thirteen-inch pan, not a round cake pan or a smaller rectangular pan. The size of the pan affects how the liquid distributes. A smaller pan will feel overly wet with the standard amount of mixture.
Duration also matters. If you let the cake soak for more than 24 hours, it will start to break down. The crumb will become very soft and delicate. Thirty-six hours is pushing it. Forty-eight hours and beyond, and you have basically made a very thick custard with cake crumbs in it. The sweet spot is 18 to 24 hours. After that, cover the cake and keep it refrigerated. It will continue to absorb very slowly, but the bulk of the absorption happens in the first 24 hours.
How Should You Garnish And Serve A Mexican Milk Cake?
Presentation matters. A properly garnished tres leches cake looks elegant and intentional. A hastily slapped-together one looks like you threw it together at the last minute, even if you spent hours perfecting the sponge and milk mixture.
Stabilizing Whipped Cream For Long-Term Display
Regular whipped cream will start to weep and collapse after a few hours, especially if the cake is sitting in a warm room or under bright lights. If you are serving the cake immediately, regular whipped cream is fine. If you need the cake to look perfect for several hours, you need to stabilize it.
The easiest method is to add one tablespoon of powdered sugar per cup of heavy cream. Sift the powdered sugar over the cream before whipping, then whip as normal. The powdered sugar stabilizes the cream and helps it hold its shape longer. Another method is to add one-quarter teaspoon of gelatin powder (bloomed in one tablespoon of cold water for five minutes, then warmed slightly to dissolve) per cup of heavy cream. Whip the cream to soft peaks, then gently fold in the dissolved gelatin, and continue whipping to stiff peaks. This creates a very stable whipped cream that will hold its shape for hours, even in a warm room.
A third option is to use a stabilized whipped cream recipe that includes a small amount of cream cheese or mascarpone. The tang of the cream cheese balances the sweetness of the cake and adds a subtle richness. Use one-quarter cup of softened cream cheese or mascarpone per cup of heavy cream. Beat the cream cheese smooth first, then add the heavy cream and whip to stiff peaks. The result is slightly less fluffy than pure whipped cream, but it is more stable and tastes incredible.
Spread or pipe the whipped cream over the cooled cake in an even layer. You can make it smooth and sleek, or you can create peaks and swirls for a more rustic look. Both approaches work. The key is to apply it right before serving or to refrigerate the finished cake and serve it within a few hours. Do not let a whipped-cream-topped cake sit at room temperature for more than two hours, or the cream will start to break down.
Recommended Slicing Techniques For Moist Cakes
Slicing a tres leches cake is different from slicing a regular cake. The sponge is delicate and saturated with liquid. If you use a regular serrated knife and saw back and forth, you will squish the cake and create jagged edges. You need a sharp knife and a clean, decisive cutting motion.
Use a long, thin, sharp knife. A nine-inch chef’s knife or a serrated bread knife both work well. Dip the knife in hot water, wipe it dry, and then make one smooth, downward cut through the cake. Do not saw. Do not apply pressure. Just let the weight of the knife and gravity do the work. After each cut, dip the knife in hot water again and wipe it dry. The heat and the moisture help the knife glide through the delicate crumb without tearing it.
If you are serving the cake directly from the pan, use a cake server or a long, thin spatula to lift each slice out. Slide it under the slice, support the slice gently, and lift straight up. Do not try to slide the slice sideways out of the pan, as this can cause it to break. If you have transferred the cake to a serving platter, you can use the same technique.
For the cleanest presentation, refrigerate the cake for at least four hours before slicing. A cold cake is firmer and easier to slice cleanly. Let the slices come to room temperature or cool room temperature before serving, about 15 to 20 minutes. The flavors are more pronounced when the cake is not ice-cold.
Is Homemade Tres Leches Better Than Store Bought?
Yes. Unequivocally. A homemade tres leches cake is superior to a store-bought one in almost every way, and the difference is noticeable from the first bite.
Cost Analysis Of Premium Baking Ingredients
A homemade tres leches cake costs roughly eight to twelve dollars in ingredients for a nine-by-thirteen-inch cake that serves 12 to 15 people. That is about 60 cents to a dollar per serving. A bakery tres leches cake of the same size costs between twenty-five and forty dollars, or about two to three dollars per serving. If you are serving a crowd, homemade is dramatically cheaper.
The ingredients are simple and inexpensive. A dozen eggs might cost four dollars. Flour, sugar, baking powder, and salt are pantry staples. A can of sweetened condensed milk costs one dollar. A can of evaporated milk costs one dollar. Heavy cream costs three to five dollars. Vanilla extract and cinnamon are negligible. That is it. You are not buying specialty ingredients or expensive flavorings. You are using things you probably already have in your kitchen.
A bakery tres leches cake is often made with shortcut ingredients like cake mix or a dense butter cake, and it is often topped with store-bought whipped cream from a can. The texture suffers because of these shortcuts. The flavor suffers too. A homemade cake, made with real eggs and real cream, tastes noticeably better because you are using better ingredients and the proper technique.
The Advantage Of Controlling Sugar Levels
Most store-bought tres leches cakes are aggressively sweet. The sponge is sweetened. The milk mixture is sweetened. The whipped cream topping is sweetened. And the fruit, if there is any, is often candied or heavily sugared. It is a dessert designed to appeal to people who want maximum sweetness in every bite.
When you make a tres leches cake at home, you control the sugar level at every step. You can reduce the sugar in the sponge by 10 to 15 percent without affecting the texture. You can use unsweetened evaporated milk instead of sweetened condensed milk if you want less sugar in the soak (though you will need to add a bit of sugar separately to make up for the loss of sweetness). You can make the whipped cream topping with less sugar or no sugar at all. You can use fresh, unsweetened fruit instead of candied fruit. The result is a cake that is still sweet and delicious but not cloying.
This is especially important if you are serving the cake to people who are watching their sugar intake or who simply prefer desserts that are not aggressively sweet. A homemade cake gives you the flexibility to dial in the sweetness level to your preference. A store-bought cake is what it is, and you cannot change it.
Elevate Your Next Celebration With This Recipe
The magic of a tres leches cake is that it looks impressive but is actually quite forgiving once you understand the fundamentals. The sponge needs to be light and airy. The milk mixture needs to be balanced and warm. The resting period needs to be long enough for the flavors to meld and the moisture to distribute evenly. Get those three things right, and you have a cake that tastes like it came from a professional bakery.
Start with the classic version. Master the technique. Once you are comfortable with the basic formula, experiment with flavor variations. Add cinnamon and vanilla. Try coconut or dulce de leche. Top it with fresh fruit. Each variation is an extension of the same core technique, not a departure from it. You are building on a foundation, not starting from scratch.
The next time someone asks you to bring a dessert to a celebration, make a homemade tres leches cake. You will see people’s faces light up when they taste it. You will hear “this is incredible” more than once. And you will know that you created something special with your own hands, using simple ingredients and a technique that has been refined over decades. That is the real victory here, not the technical perfection or the professional appearance, though those things matter too. The victory is in knowing that you nailed something that most people think is too difficult to attempt.
Frequently Asked Questions
Can I Make Tres Leches Cake Ahead Of Time?
Yes. In fact, tres leches cake improves when made ahead. Bake the sponge, soak it with the milk mixture, cover it, and refrigerate it. It will keep for three to four days in the refrigerator. Add the whipped cream topping no more than four hours before serving. The cake actually tastes better on day two or three than it does on day one, as the flavors have time to fully develop.
What If I Do Not Have Evaporated Milk?
Evaporated milk is essential to the flavor and texture of a proper tres leches cake. It provides a subtle caramelized note and a specific richness that you cannot replicate with other ingredients. If you cannot find it at your local grocery store, check a Latin market or order it online. Do not substitute it with heavy cream or regular milk. The result will taste completely different and will not be a true tres leches cake.
Can I Use A Store-Bought Sponge Cake?
You can, but it is not ideal. A store-bought sponge cake is often denser and more heavily stabilized than a homemade one, which means it will not absorb the milk mixture as effectively. If you must use a store-bought cake, choose the lightest, most basic vanilla sponge you can find, and reduce the amount of milk mixture by about one-quarter cup. Proceed carefully and check the cake after 12 hours to make sure it is absorbing properly and not becoming too soggy.
How Long Does Tres Leches Cake Last In The Refrigerator?
A covered tres leches cake will keep in the refrigerator for three to four days. The sponge will not dry out because it is saturated with milk. The whipped cream topping will start to break down after about two days, so if you are storing the cake for longer than that, add the whipped cream and fresh fruit right before serving. Do not freeze a tres leches cake with the whipped cream topping on it, as the texture will be ruined when it thaws.
What Is The Difference Between Tres Leches And Tres Leches Cake?
There is no meaningful difference. “Tres leches” means “three milks” in Spanish, and “tres leches cake” is the English name for the same dessert. Some people use the terms interchangeably. The dessert is always the same: a vanilla sponge soaked in a mixture of three milks and topped with whipped cream.
Can I Make Tres Leches Cake Without Eggs?
A traditional tres leches cake relies on eggs for structure and lift. An eggless sponge cake is possible, but it will be denser and will not absorb the milk mixture the same way a classic sponge does. If you need to make an eggless version, use an eggless sponge cake recipe that relies on whipped aquafaba (chickpea liquid) or other leavening agents, and proceed with the milk soak as normal. The result will be slightly less fluffy but still delicious.
Should I Pierce The Cake Before Pouring The Milk Mixture?
Yes. Piercing the cake with a fork or skewer creates tiny channels that allow the milk mixture to penetrate deeper into the sponge. Without piercing, the liquid will sit on the surface and absorb very slowly. Pierce the entire surface of the cake in a crosshatch pattern, aiming for one puncture every half-inch or so. This step takes two minutes and makes a significant difference in how evenly the cake absorbs the milk.
Can I Add Alcohol To The Milk Mixture?
Yes. A splash of rum, brandy, Kahlúa, or any other liqueur you like works well. Add about two to three tablespoons of alcohol per three and a half cups of milk mixture. The alcohol will add flavor and will slightly slow down the absorption of the milk, which is actually beneficial because it allows for more even distribution. The alcohol will not bake off because you are not cooking the mixture, but it will mellow out after 24 hours of soaking. The cake will taste like it has a subtle boozy note, not like a shot glass.