How to Make a Cake 5 From Scratch
Table of Contents
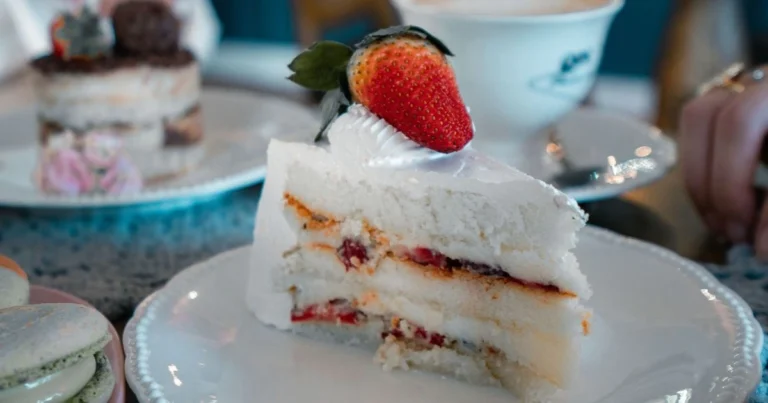
A homemade white cake is nothing like a box mix. Box mixes taste like they were engineered by a committee. A cake baked from scratch tastes like butter, vanilla, and intention. The difference isn’t subtle. It’s the gap between a grocery store bouquet and something you actually want to look at.
This guide walks you through every step of baking a proper white cake from scratch. You’ll learn why the method matters as much as the ingredients, how to troubleshoot the common disasters (dense crumb, dry texture, sunken centers), and how to decorate it so it looks like you paid someone. By the end, you’ll have a repeatable formula that works every single time.
Why Should You Bake Cake From Scratch Instead Of Using Mixes?
The mix-versus-scratch argument is old, but it’s worth settling. Yes, box mixes are faster. No, that speed is worth the trade-off.
When you bake white cake from scratch, you control every single variable. You choose the butter quality, the vanilla source, the flour type, the egg freshness. A box mix is a formula designed to survive shipping, shelf time, and the assumption that you’ll mess something up. Scratch baking assumes you actually care about the result.
Flavor Depth And Ingredient Quality
Fresh butter tastes like butter. The butter in a box mix was processed, stored, and potentially rancid before it reached your kitchen. Real vanilla extract (not vanillin, the synthetic compound) carries flavor notes that actually develop as the cake bakes. Quality all-purpose flour or cake flour has a different protein structure than the flour component in a mix, which means your crumb will be tender instead of cottony or dense.
You’ll taste the difference in the first bite. The vanilla isn’t a ghost note. The butter comes through. The cake tastes like something, not like a placeholder.
Texture Control And Customization
Scratch baking lets you dial in exactly how moist, how fluffy, how dense you want the final cake. If you prefer a denser crumb, you reduce the leavening. If you want maximum lift, you adjust your creaming time. You can swap milk for buttermilk to add tang. You can use oil instead of butter for extra moisture, or butter instead of oil for richer flavor.
You can also accommodate dietary needs without buying a specialty mix. Vegan? Use aquafaba. Gluten-free? Swap your flour blend. Dairy-free? Choose your milk alternative. A box mix locks you into their formula. Scratch baking is flexible.
What Are The Essential Ingredients For White Cake?
Every ingredient in a cake from scratch serves a specific structural or flavor purpose. Understanding what each one does helps you troubleshoot when something goes wrong and gives you confidence to adjust.
Dry Ingredients And Their Functions
All-purpose flour is your structural backbone. It contains enough protein (around 10-12 percent) to give the cake structure without making it tough. Cake flour (8-9 percent protein) will yield a more tender crumb, but all-purpose works perfectly fine. Some bakers use a blend of both.
Baking powder is your primary leavening agent. It’s an acid-base reaction that creates carbon dioxide bubbles, which are what give the cake its rise and crumb structure. Most recipes use double-acting baking powder, which reacts twice: once when wet, again when heat is applied. Baking soda is used only if your recipe includes an acidic ingredient like buttermilk or lemon juice.
Salt is not optional. It doesn’t make the cake taste salty. It enhances the vanilla and butter flavors, and it controls how fast the baking powder reacts. Too little salt, and your leavening can be chaotic. The right amount keeps everything balanced.
Wet Ingredients That Create Tender Crumb
Butter is flavor and richness. It’s also an emulsifier, which means it helps bind the wet and dry components together. Room-temperature butter creams with sugar into a light, fluffy mixture that traps air bubbles. Cold butter won’t cream properly. Melted butter will make the cake denser.
Eggs provide structure, moisture, and act as another emulsifier. The protein in eggs sets as the cake bakes, which is what gives you crumb instead of soup. Most white cake recipes use whole eggs, though some use only whites for an extra-white color (which is why you see “white cake” recipes specify egg whites).
Milk is your moisture component. Whole milk adds richness. Low-fat milk works but produces a slightly drier cake. The milk also helps distribute the leavening evenly throughout the batter. Temperature matters here too. Room-temperature milk incorporates more smoothly than cold milk.
Vanilla extract is where you get the vanilla flavor that makes people say “wow, that tastes like cake.” Pure vanilla extract is worth the cost. Imitation vanilla (vanillin) is harsher and less complex. Some recipes also include almond extract in small amounts to enhance the vanilla without making the cake taste like almonds.
How Do You Make A Perfect White Cake From Scratch?
The method matters as much as the ingredients. A white cake from scratch is made in a specific sequence for a reason. Skip steps or change the order, and you’ll get different results.
Creaming Butter And Sugar For The Right Texture
Start with butter at room temperature (around 65-70 degrees Fahrenheit). Cut it into chunks so it softens faster. Add your sugar and beat on medium-high speed for 3 to 5 minutes. You’re looking for a texture that’s pale, fluffy, and roughly the consistency of wet sand. It should look almost spreadable, not dense and grainy.
This step is where you trap air into the batter. Those tiny air pockets expand when heat is applied, which is how you get rise and a tender crumb. If you skip this or rush it, your cake will be dense. If you overdo it and beat for 10 minutes, you’re wasting time and potentially overdeveloping gluten.
How do you know you’re done? Lift the beaters and look at the mixture clinging to them. It should fall off in soft clumps, not stick like peanut butter. The color should be noticeably lighter than the original butter. That’s your signal to move on.
Alternating Dry Ingredients And Wet Ingredients
This is the step that confuses most home bakers. You don’t dump all the dry ingredients in at once, and you don’t dump all the wet ingredients in at once. Instead, you alternate, starting and ending with dry ingredients. A typical pattern for a two-layer cake is: dry, wet, dry, wet, dry.
Why? Dry ingredients on their own can be overmixed without developing gluten too much. Wet ingredients incorporated into the creamed butter-sugar base help distribute the leavening evenly. By alternating, you’re giving the batter a chance to incorporate each component smoothly without overdeveloping the flour’s gluten structure, which would make the cake tough.
The order is crucial. Start by adding about one-third of your dry ingredients to the creamed butter-sugar. Mix on low speed until just combined. Then add about half of your wet ingredients. Mix until just combined. Add another third of dry ingredients, mix. Add the remaining wet ingredients, mix. Finish with the final third of dry ingredients and mix until just combined.
Here’s the critical part: “just combined” means you can no longer see streaks of flour. It does not mean you beat it smooth. Overmixing at this stage develops gluten, which makes the cake dense and tough. Once you see no dry streaks, stop. The batter should look slightly lumpy and thick, not silky and pourable.
Baking Temperature And Timing
Preheat your oven to 350 degrees Fahrenheit at least 15 minutes before you pour in the batter. An oven that’s not fully preheated will bake unevenly. Grease and flour your cake pans (or use parchment paper on the bottom). For a standard two-layer cake, use 9-inch round pans.
Divide the batter evenly between the pans. A kitchen scale is helpful here, but you can also eyeball it. Pour the batter in, then gently tap the pans on the counter a few times to release trapped air bubbles. This prevents large air pockets from forming, which would create tunnels or a sunken center.
Bake for 28 to 35 minutes. The exact time depends on your oven, your pan material (dark pans bake faster than light pans), and how full your pans are. Start checking around 25 minutes. The cake is done when a toothpick inserted in the center comes out clean or with just a few moist crumbs. The top should spring back when you lightly press it. If it jiggles noticeably in the center, it needs more time.
Remove the cakes from the oven and let them cool in the pans for 10 minutes. This sets the structure enough that they won’t fall apart when you turn them out. Then turn them onto wire racks to cool completely. Don’t frost a warm cake. The frosting will melt and slide right off.
What Common Mistakes Should You Avoid When Baking From Scratch?
Most white cake disasters fall into a few categories. Once you know what causes them, you can prevent them.
Overmixing And Ingredient Temperature Issues
The most common mistake is overmixing the batter after you add the dry ingredients. Every extra 30 seconds of mixing develops more gluten, which makes the cake denser and tougher. You want a tender crumb, not a spongy, rubbery texture. Mix until the flour is incorporated. That’s it. Stop.
Cold ingredients are another silent killer. If your butter is cold, it won’t cream properly. If your eggs are cold, they won’t emulsify smoothly. If your milk is cold, it can cause the batter to seize up or separate. Pull everything out of the fridge 30 minutes before you start baking. This is especially important in winter or in a cold kitchen.
If your batter looks curdled or broken (the butter and wet ingredients aren’t mixing smoothly), the temperature mismatch is usually the culprit. Add a tablespoon of your flour mixture to the batter and beat for a few seconds. This can help bring it back together. Then continue with your recipe.
Oven And Equipment Problems
Most home ovens are off by 25 degrees or more. If your cakes are consistently coming out too dark on the edges or too pale in the center, your oven temperature is probably inaccurate. Invest in an oven thermometer (they cost about ten dollars). Place it in the center of your oven and check the actual temperature before you bake.
Dark pans bake faster and hotter than light pans. If you’re using dark nonstick pans, reduce your oven temperature by 25 degrees Fahrenheit. Glass pans also bake hot. Light-colored metal pans are the most forgiving.
Uneven baking usually means your oven has hot spots. If one side of your cake is baking faster than the other, rotate the pans halfway through baking. If your cake is doming significantly (the top is puffed up like a mushroom), your oven temperature is too high. Lower it by 25 degrees and bake a little longer.
Which Frosting Pairs Best With Homemade White Cake?
The frosting makes or breaks the final cake. You’ve baked something delicious. Don’t ruin it with a frosting that tastes like sweetened shortening.
Buttercream And Cream Cheese Frostings
American-style buttercream (butter, powdered sugar, milk, vanilla) is the easiest frosting to make and the most forgiving. Beat softened butter until creamy, gradually add powdered sugar, add a splash of milk and vanilla, and beat until fluffy. It tastes like butter and sugar, which is exactly what you want with a delicate white cake. It’s also sturdy enough to pipe and hold decorations.
Cream cheese frosting adds tang and richness. Beat room-temperature cream cheese and butter together, then add powdered sugar and vanilla. The tang of the cream cheese complements the vanilla in the cake beautifully. The only downside is that it’s softer than buttercream and needs to stay refrigerated. If your kitchen is warm, it can get droopy.
Swiss Meringue And Whipped Cream Options
Swiss meringue buttercream is silkier and less heavy than American buttercream. It’s made by whisking egg whites with sugar over gentle heat, then beating in butter. It’s more complex to make, but the result is elegant and less sweet. It’s worth learning if you’re planning to frost a lot of cakes.
Whipped cream frosting is light and airy, but it’s not stable for more than a few hours. Use it only if you’re serving the cake immediately. It’s perfect for a casual cake that you’re eating the same day you bake it. For a cake that needs to sit for a few hours or overnight, stick with buttercream or cream cheese.
How Can You Customize Cake From Scratch For Special Dietary Needs?
The beauty of baking from scratch is that you can adapt the recipe for almost any dietary restriction. The results won’t be identical to the original, but they’ll still be delicious.
Egg Substitutes And Plant-Based Alternatives
For vegan baking, aquafaba (the liquid from a can of chickpeas) is your best substitute for eggs. Use three tablespoons of aquafaba per egg. It whips up into stiff peaks just like egg whites and provides structure and moisture. The resulting cake is slightly less tender than one made with real eggs, but the difference is minimal.
Applesauce (one-quarter cup per egg) and mashed banana (one-quarter cup per egg) also work as egg substitutes. They add moisture and binding power, but they also add flavor. Use applesauce if you want a neutral flavor, banana if you want a subtle sweetness. Flax eggs (one tablespoon ground flax mixed with three tablespoons water per egg) work but result in a slightly denser, earthier cake.
Flour Swaps And Dairy-Free Options
For gluten-free baking, use a high-quality gluten-free flour blend that includes xanthan gum or psyllium husk for structure. Bob’s Red Mill 1-to-1 baking flour is a reliable choice. Use the same amount as all-purpose flour. Gluten-free cakes are slightly more delicate and may need an extra minute or two of baking time. They also tend to dry out faster, so store them in an airtight container.
For dairy-free baking, replace butter with a dairy-free butter substitute (coconut oil or vegan butter) in a 1-to-1 ratio. Replace milk with your choice of plant-based milk (oat, almond, soy, or coconut all work). Soy milk has the most protein and will give you the best structure. Avoid thin, low-protein milk alternatives if you can.
Pro Decorating Tips For Your Homemade White Cake
Once your cake is baked and cooled, you have options. You can keep it simple with a smooth frosting and fresh flowers. You can go elaborate with piping and fondant. Either way, a few techniques will make you look like you actually know what you’re doing.
Leveling And Stacking Layers Properly
Most home-baked cakes dome slightly on top. Before you stack them, level off the dome so you have flat surfaces to work with. A serrated knife or a cake leveler works. Gently saw through the dome, using a turntable if you have one so you can rotate the cake as you go. You want to remove just the domed part, not half the cake.
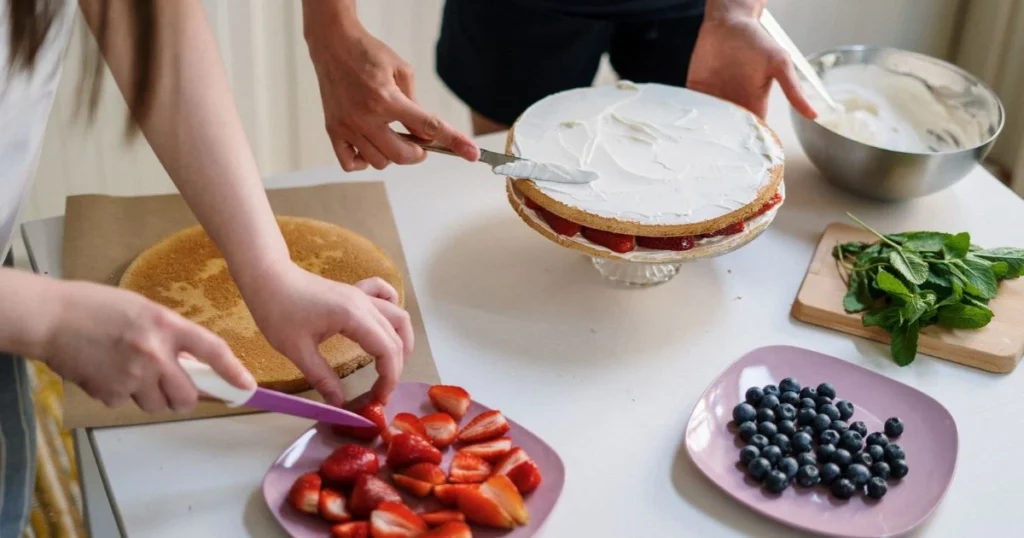
Once both layers are level, place the first layer on your cake board or serving plate. Add a dollop of frosting to the center to keep it from sliding. Pipe or spread a thin layer of frosting on top. Place the second layer on top, pressing gently so it sits evenly. Now you’re ready to frost the outside.
Frosting Techniques And Fondant Finishing
A crumb coat is a thin layer of frosting that seals in the crumbs so your final frosting layer is smooth. Spread a very thin layer of frosting over the entire cake (top and sides). Refrigerate for 15 minutes until it’s set. Then apply your final frosting layer over the crumb coat. This technique is the difference between a professional-looking cake and one that looks homemade.
For a smooth finish, use an offset spatula dipped in warm water. The warmth softens the frosting just enough that you can smooth out the peaks and swirls. Work quickly before the frosting sets.
If you want to get fancy, fondant gives you a perfectly smooth, almost porcelain-like finish. Knead store-bought fondant until it’s pliable, dust your work surface with powdered sugar, roll out the fondant to about one-quarter inch thick, and drape it over your frosted cake. Smooth it down gently, working out air bubbles. Trim the excess from the bottom. It looks impressive, but it’s sweeter and chewier than frosting alone. Most people prefer the taste of a cake with just frosting, but the visual impact of fondant is undeniable.
Frequently Asked Questions
Can I Make A White Cake From Scratch The Day Before Serving?
Yes. Bake the cake layers a day or two ahead, wrap them tightly in plastic wrap, and store them at room temperature or in the refrigerator. Frost the cake on the day you’re serving it for the best texture. If you must frost it ahead, refrigerate the frosted cake until serving time, then let it sit at room temperature for 30 minutes before cutting so the frosting softens slightly.
Why Is My White Cake Coming Out Dense Instead Of Fluffy?
Density usually comes from overmixing the batter, using cold ingredients, or not creaming the butter and sugar long enough. Check that your butter is truly soft before you start, cream it with sugar for at least three minutes, and stop mixing the batter as soon as the flour disappears. Also verify that your oven temperature is accurate with a thermometer.
What’s The Difference Between Cake Flour And All-Purpose Flour For White Cake?
Cake flour has less protein (around 8-9 percent) than all-purpose flour (10-12 percent), which means it produces a more tender, delicate crumb. All-purpose flour works perfectly fine for white cake and is more versatile. If you want the most tender result, use cake flour. If you want a sturdier cake that’s easier to handle, use all-purpose.
How Long Can I Store A Frosted White Cake?
A frosted white cake with buttercream frosting lasts about three days at room temperature, covered loosely. Cream cheese frosting requires refrigeration and lasts about five days. Whipped cream frosting should be eaten within a few hours. For longer storage, freeze unfrosted cake layers for up to three months, wrapped tightly in plastic wrap.
Can I Use Oil Instead Of Butter In A White Cake From Scratch?
Yes, but the result will be slightly different. Oil produces a moister cake with a more tender crumb, but you lose some of the butter flavor. Use a neutral oil (vegetable, canola, or light olive oil) and replace butter with oil in a 1-to-1 ratio. You can also use a blend of half butter and half oil for a middle ground.
Why Is My Cake Sinking In The Center?
A sunken center usually means your oven temperature is too low or you’re not baking long enough. The center cooks last, and if the oven isn’t hot enough, the sides set before the center has a chance to cook through. Use an oven thermometer to verify temperature, and bake for the full time specified in the recipe. Also make sure you’re not opening the oven door too early, which lets heat escape.
What’s The Best Way To Level Cake Layers At Home?
A serrated bread knife works well. Place the cake on a turntable, put your non-knife hand on top of the cake to stabilize it, and gently saw through the dome using a sawing motion. Rotate the turntable as you go so you’re cutting evenly all the way around. A cake leveler (a tool with a wire that adjusts to the height you want to cut) is even easier if you plan to bake cakes regularly.
Can I Make White Cake Cupcakes Instead Of Layers?
Absolutely. Use the same batter and fill standard cupcake liners about two-thirds full. Bake at 350 degrees Fahrenheit for 18 to 22 minutes, until a toothpick comes out clean. Frost with the same frosting you’d use on a layer cake. Cupcakes are actually easier to handle and frost than full-size cakes, especially if you’re new to baking.
Put The Whisk Down
Here’s what people get wrong about baking a white cake from scratch. They think the magic is in having perfect ingredients or following the recipe exactly. It’s not. The magic is in stopping before you ruin it.
Stop creaming the butter and sugar when it’s pale and fluffy, not when you’re tired of waiting. Stop mixing the batter when you can’t see dry flour, not when it looks silky. Stop baking when a toothpick comes out clean, not when you’re sure it’s done. The difference between a spectacular cake and a dense, dry disaster is often just 30 seconds of restraint.
You’ve got the method now. You know why each step matters and what happens when you skip it. The next time you want a white cake, you won’t reach for a box mix. You’ll pull out butter, eggs, milk, and vanilla. You’ll cream and alternate and watch the timer. And you’ll pull out a cake that tastes like you actually made it, because you did.